How to create a new SqueakMap Release
Last updated at 8:05 pm UTC on 16 September 2018
To create a new release of an existing SqueakMap package:
- Open the SqueakMap Catalog.
- Find the package to create a new release for. (New Packages can only be registered via the web-interface).
- Select the release on which the new release should be based. (Although, ancestry is not needed or used in SqueakMap, so it should, alternatively be fine to select the main-level package).
- Select "Create new Release" from the context menu.
- The SqueakMap Release browser is opened.
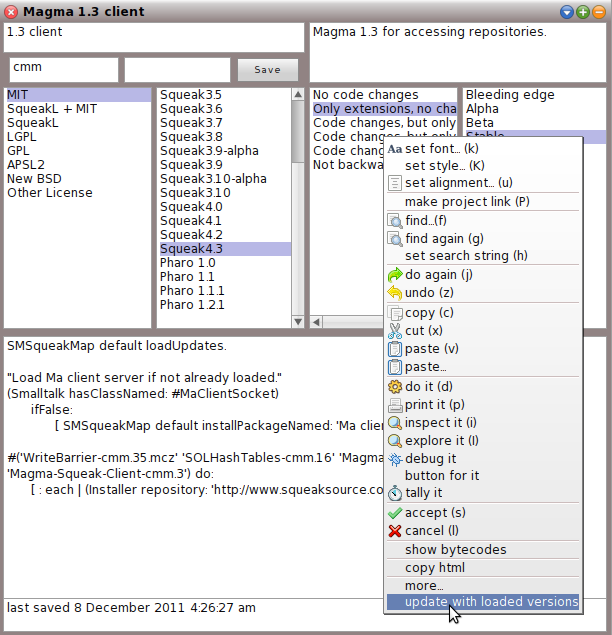
- If this is just a new release of a fixed configuration, there is a convenience function on the script-pane menu, "update with loaded versions". See screenshot, below. Be sure to check very carefully if you use that function.
- The installation script should be written to follow the SqueakMap Publishing Guidelines.
- Fill in all of the fields. Hover over them to see balloon help about what goes in there. Press Command+S to save their contents of each field.
- When all fields are filled in, press the "Save" button.
- An HTTP communication is made with the SqueakMap server, the script file is uploaded into your personal directory of files, and a new release for the package is created. The Release window is closed.


