The inspector allows you do examine and make changes to live objects in the system.
Prerequisite - or what you should know before you come here.
Before starting this tutorial you should be familiar with and comfortable in the Squeak environment. Specifically you need to know how to select items on the screen using the mouse and how the red, yellow and blue mouse buttons are selected on your mouse.
Note
In this document the term click is to be interpreted as red click.
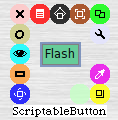
In the submenu that opens up, move the pointer to 'from alphabetical list' and then to 'S-S' and finally to 'ScriptableButton'. Click on that and a ScriptableButtonMorph will appear where you were pointing. Drag it somewhere on the screen and click to drop it.
You've now created a live instance of the ClassScriptableButton. Go ahead and click on it. You'll notice the morph change color while the mouse button is down and return to its original color when the button is released.
The Inspector
Now we'll open an inspector on this morph. To do this we will bring up the morph's halo.
Place the mouse pointer over the morph.
blue click on the morph. This brings up the morphs halo. For this section we are most concerned with the red menu icon and the grey debug icon.
Click on the grey debug icon (the one that looks like a wrench). This will open the morphs debug menu.
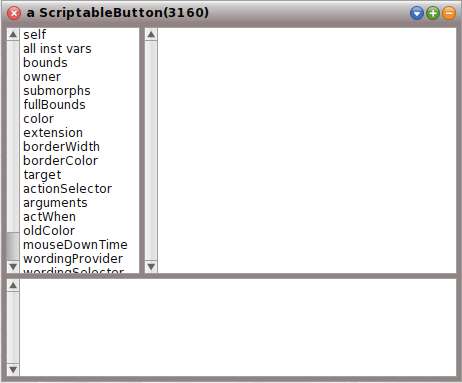
Select the top entry inspect morph. This will open an inspector on the morph.
Resize the inspector so that you can read all the entries in the left-hand column.
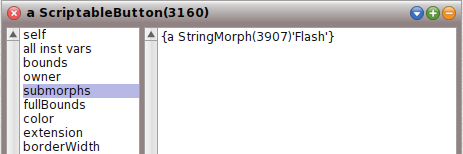
Take a moment to examine the labels in the left hand column. If you click on a label its value will be displayed in the right hand pane. Lets click on self. This displays this morph's information Now click on submorphs. You should see #(a StringMorph(nnnn)'Flash') (note: The nnnn wiil be replaced by an number which is an internal identifier of the object) . This shows that this button morph has one submorph which is a StringMorph and that this StringMorph contains the string Flashe. Where have we see that string? It is of course this buttonmorphs label.
Now go back and open the Buttons halo (Remember blue click on the morph). Select the red menu icon. Pin the menu open (Click on the icon on the right top side of the menu).
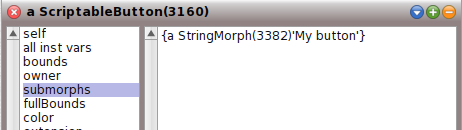
Here we'll be dealing with the menu items located at the bottom of the menu. Select the menu item change label. This will open a FillInTheBlank morph which is used to get input from a user. You'll notice the title of morph is Enter a new label for this button. You'll also notice that the Buttons current label Press me is entered in the box. Go ahead and type in a new label, say My button and press accept.