How to designate existing SqueakMap packages for a new version of Squeak
Last updated at 8:07 pm UTC on 16 September 2018
These steps describe for the common-case: projects that are code-only
- Launch the new Squeak image.
- Open SqueakMap.
- Turn off the "New safely-available packages" filter.
- Find the package to migrate in the list, install and test it and fix any bugs.
- Post any new package versions to SqueakSource (or your favorite SCM repository).
- In the SqueakMap window, select the package, then Yellow-click on the package, then select Create new Release from the menu.
- Make the necessary updates to the version numbers of the packages in the script.
- Fill in the new version name, short release note, your SqueakMap id and password.
- Click the "Save" button.
Repeat the above steps for each package. The next time in a trunk image, click the "Update" button on the SqueakMap catalog to see your new catalog entries. Its always good to test the installation of the new releases, and run the tests, if any.
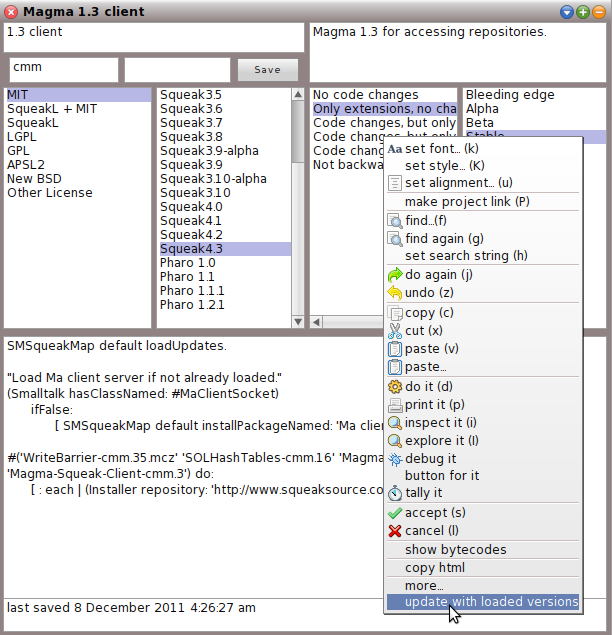
(Shortcut for updating the load script: Once a install script for a fixed-configuration is initially created, typically the package-version numbers need for certain packages need to be updated. The "update with loaded versions" command on the menu of the script-pane can be used – it will string-search the script for package names and replace their version numbers with the versions of those packages which are currently loaded in the image – with the newly published packages. Here is a screen shot.

See also: "How to create a new SqueakMap Release"


