Example - aMorph addMorph: anotherMorph (no layout and TableLayout)
Last updated at 12:26 pm UTC on 7 August 2020
The method
#addMorph: aMorph
is used to add a submorph (child morph, Composite pattern).
 m := Morph new extent: 320@240; color: Color white; openInWorld.
 m addMorph: (EllipseMorph new color: Color red; position: 50@50).
 m addMorph: (EllipseMorph new color: Color green; position: 100@50).
 m addMorph: (EllipseMorph new color: Color blue; position: 150@50).
 m submorphs
Here the submorphs get an absolute position.
The result of print-it is
{an EllipseMorph(1687539) . an EllipseMorph(600081) . an EllipseMorph(2464004)}
1. No positioning - layoutPolicy is nil
If there is no absolute positioning of the submorphs, they get stacked at the origin.
m := Morph new extent: 320@240;
         position: 10@30;
         openInWorld.

m addMorph: (EllipseMorph new color: Color red).
m addMorph: (EllipseMorph new color: Color green).
m addMorph: (EllipseMorph new color: Color blue).

Thus a LayoutPolicy is needed.
2. Using the default TableLayout object.
m := Morph new extent: 320@240;
         position: 10@30;
         layoutPolicy: TableLayout new;
         openInWorld.

m addMorph: (EllipseMorph new color: Color red).
m addMorph: (EllipseMorph new color: Color green).
m addMorph: (EllipseMorph new color: Color blue).
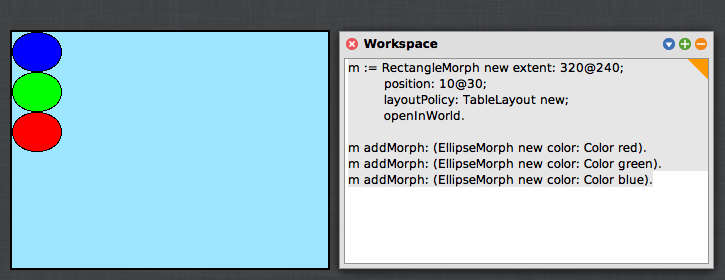
The method #addMorph: adds a submorph in front, thus the blue ellipse which was added last shows up first.

The method #addMorphBack: adds a morph at the end.
m := Morph new extent: 320@240;
         position: 10@30;
         layoutPolicy: TableLayout new;
         openInWorld.

m addMorphBack: (EllipseMorph new color: Color red).
m addMorphBack: (EllipseMorph new color: Color green).
m addMorphBack: (EllipseMorph new color: Color blue).
So the red morph shows up on the first, position the green and blue on the second and third.
Also note that the morphs are added from top to bottom. The property which defines this is 'listDirection'
Doing a 'print it'
m listDirection
in the same workspace gives you
#topToBottom
This is the default value you get when choosing the layoutPolicy:
layoutPolicy: TableLayout new;
You may also note that the submors are aligned in the top let corner. The property which controls this is called 'listCentring'.
The default value is
     m listCentering
     #topLeft

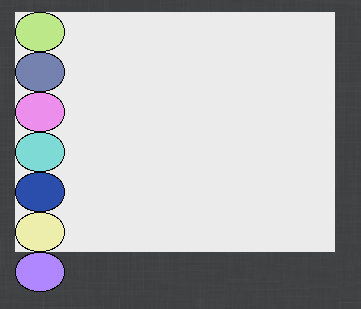
If you add more morphs you get an overflow
 m := Morph new extent: 320@240;
         position: 10@30;
         color: Color white darker;
         layoutPolicy: TableLayout new;
         openInWorld.
1 to: 7 do: [:n | m addMorph: (EllipseMorph new color: Color random lighter)].
The result:

3. TableLayout object with wrapDirection set to get multiple columns.
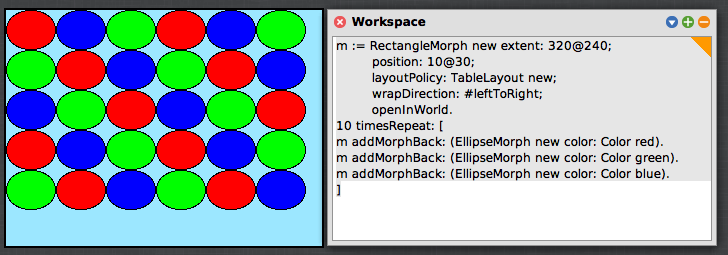
If more submorphs are added a #wrapDirection: needs to be set for the TableLayout.
m := Morph new extent: 320@240;
         position: 10@30;
         layoutPolicy: TableLayout new;
	 wrapDirection: #leftToRight;
         openInWorld.
10 timesRepeat: [
m addMorphBack: (EllipseMorph new color: Color red).
m addMorphBack: (EllipseMorph new color: Color green).
m addMorphBack: (EllipseMorph new color: Color blue).
]

For more about submorphs consult the System Browser, class Morph categories
- submorphs-accessing
- submorphs-add/remove
See also
How do I get access to a particular submorph?
How to apply some code to all submorphs of a Morph
Note that in Pharo there is no longer a RectangleMorph class. If you just use Morph instead the result will be similar.
tagBeginner


